Usage Guide

User guide to generate mock data

This guide introduces the basics of how to use Cloak's mock data generation tool. Follow the steps below to get started.

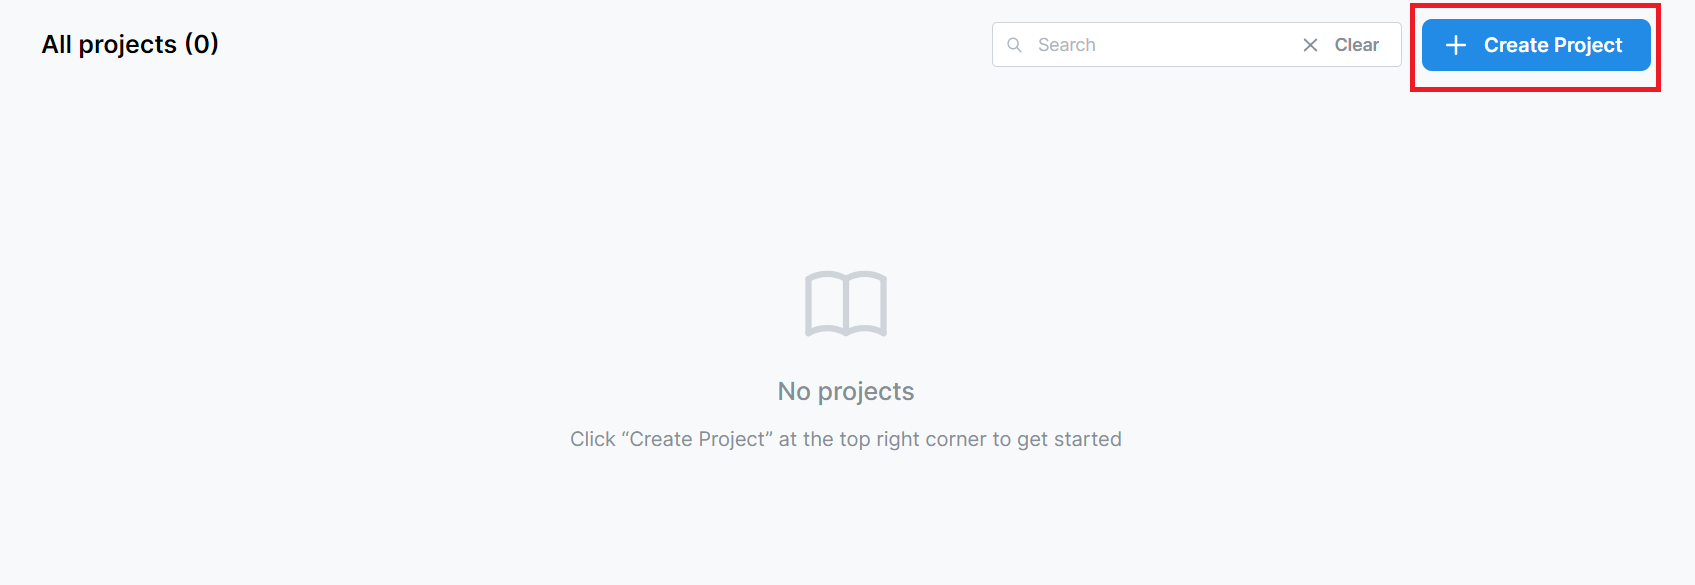
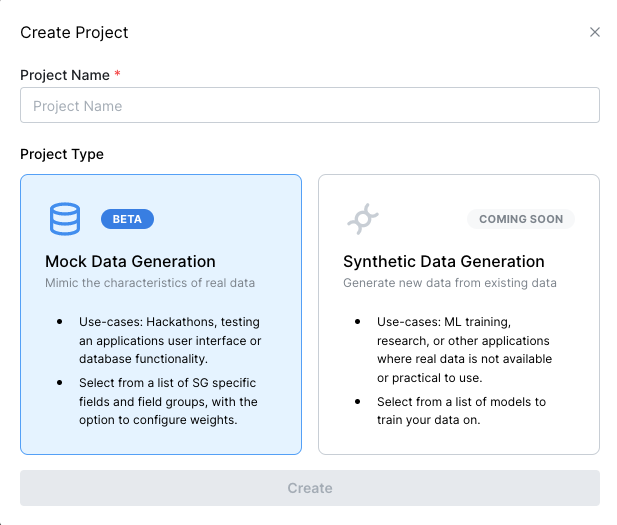
Step 1: Create a new project

Click "Create Project" at the top right corner.

Enter a name for your project under Project Name and select "Mock Data Generation" as your Project Type.

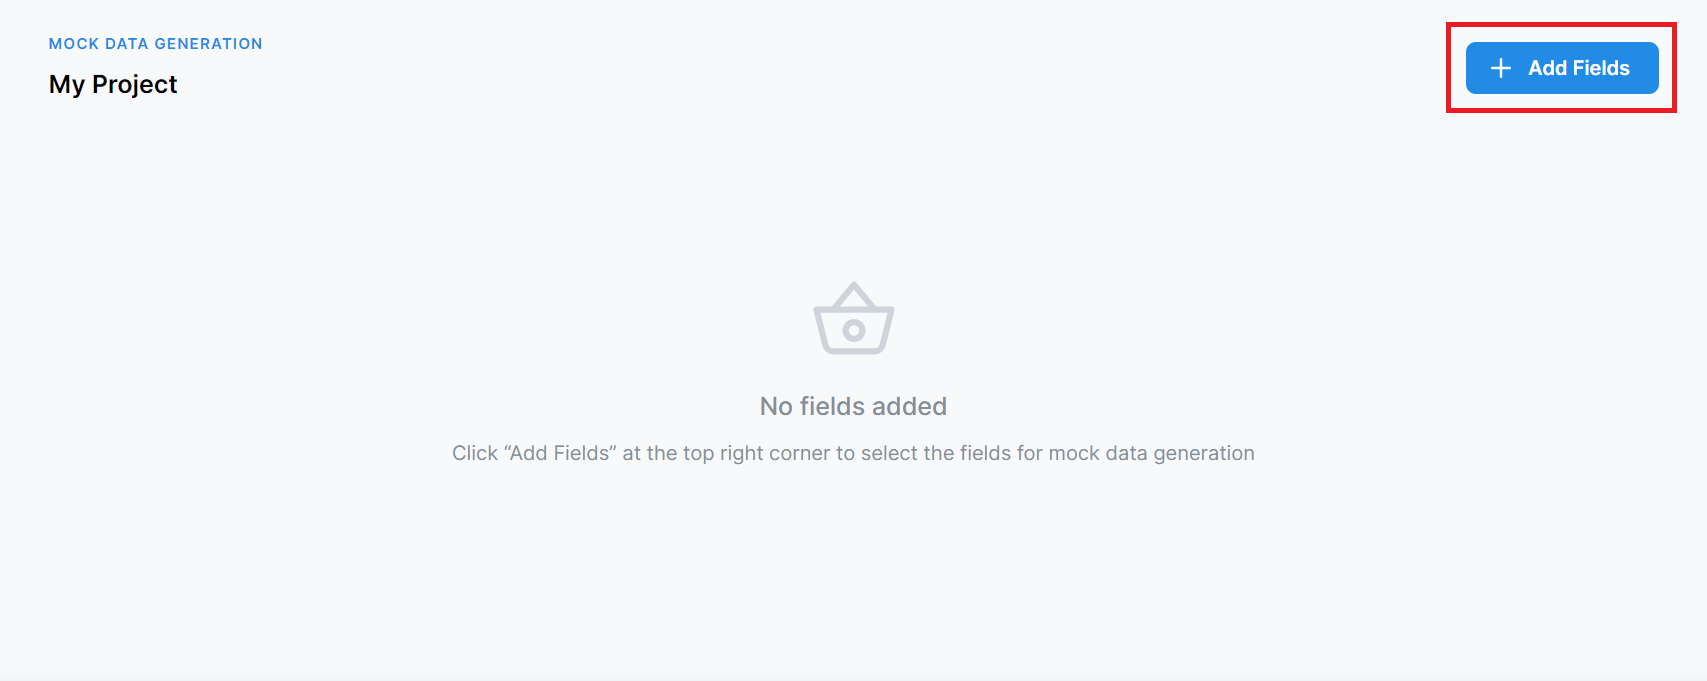
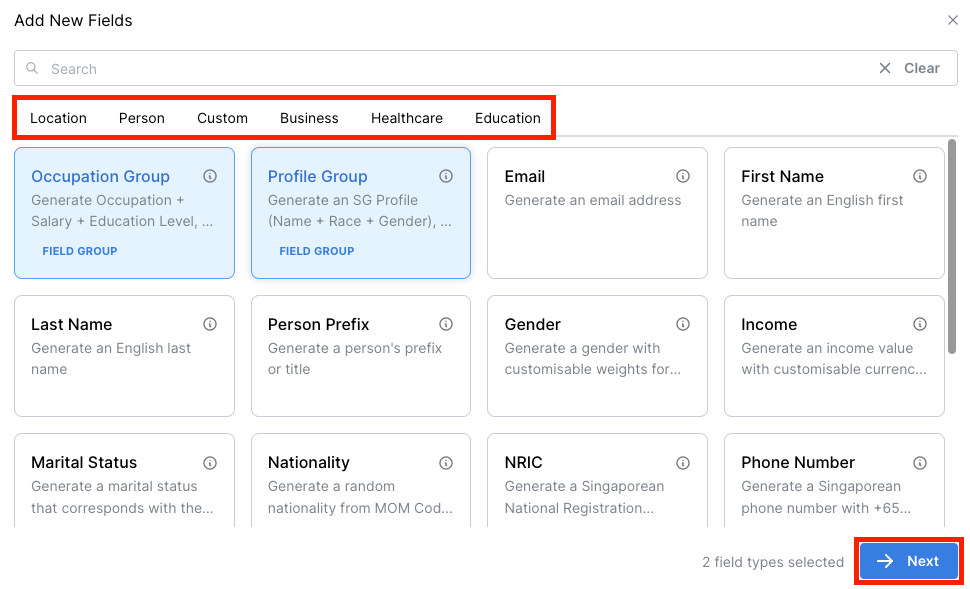
Step 2: Add data fields

After creating the project, you should be promptly re-directed to your project's page! Click "Add Fields" at the top right corner.

Search or browse the list of data field types sorted by categories. Select your desired field types and click "Next" to continue.

circle-info

A Field Group preserves the relationship between data fields in the group. At the moment, there are 3 Field Groups:

  • Profile Group: Name, Race and Gender

  • Occupation Group: Occupation, Salary, Education

  • Address Group: Blk, Building, Postal, Road

Adding a Field Group will result in the creation of multiple columns. Only one of each Field Group type can be added.

Check that the selected field types are correct. For single field types (not Field Groups), you may add multiple quantities of each field type.

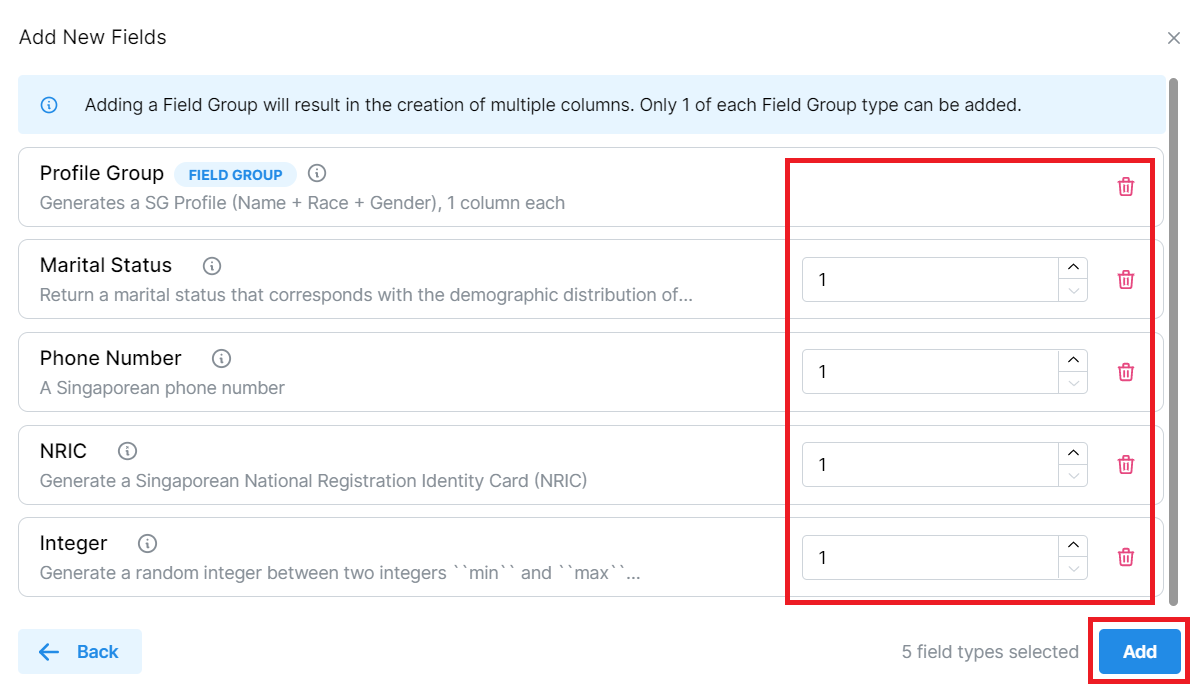
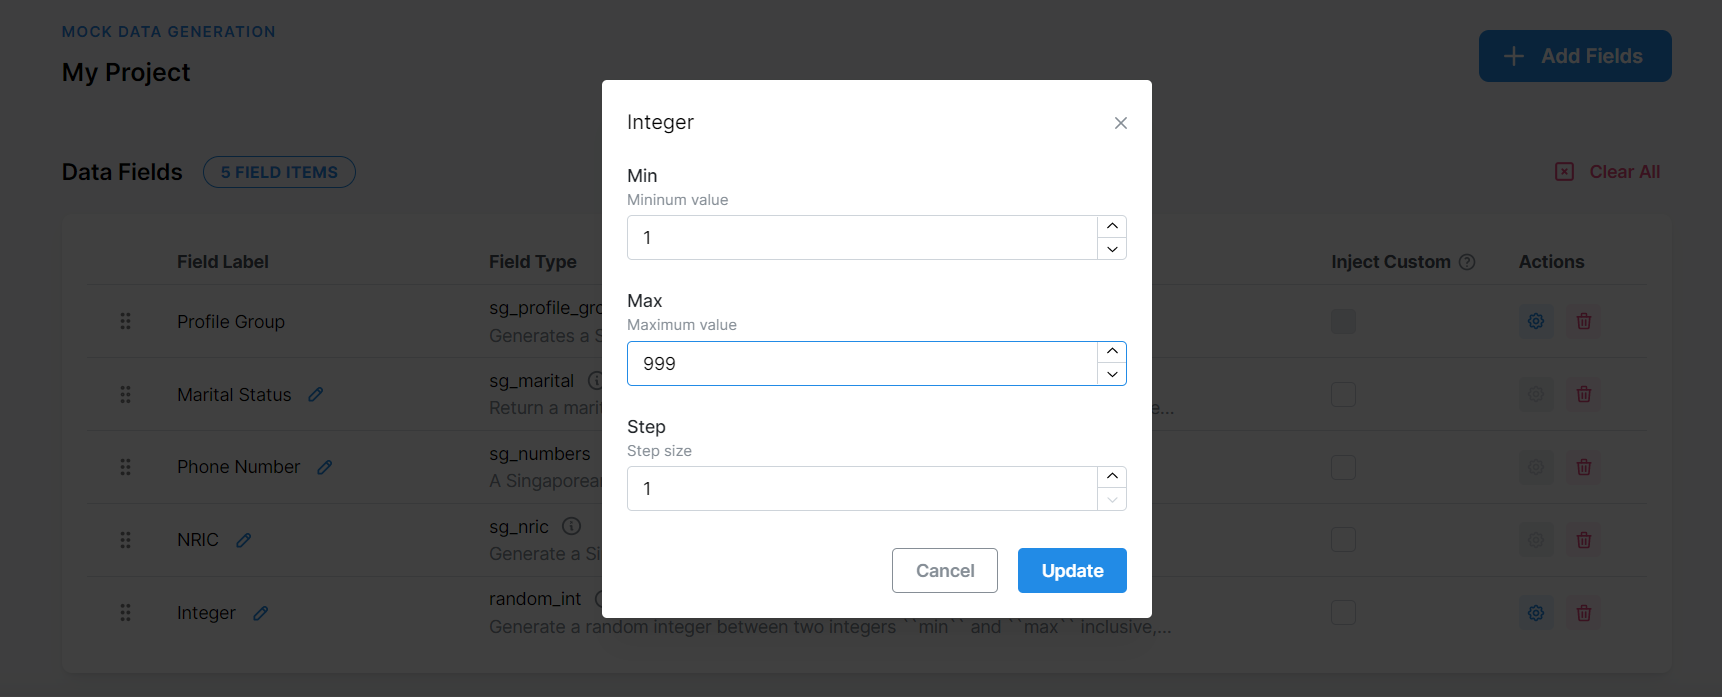
Step 3: Customise your data fields

Renaming Fields: Feel free to customise the name of your selected data fields by clicking the blue pencil icon next to the field label.

circle-info

For single field types (not Field Groups), you may inject a custom value (string/number/blank) into the mock data. Simply check the checkbox next to the field under the "Inject Custom" column to input your custom value and injection probability.

Customisation: For selected field types, you may click the blue gear icon under "Actions" to configure specific parameters for that field.

Example of a customisable field type: setting min, max and step size of Integer field

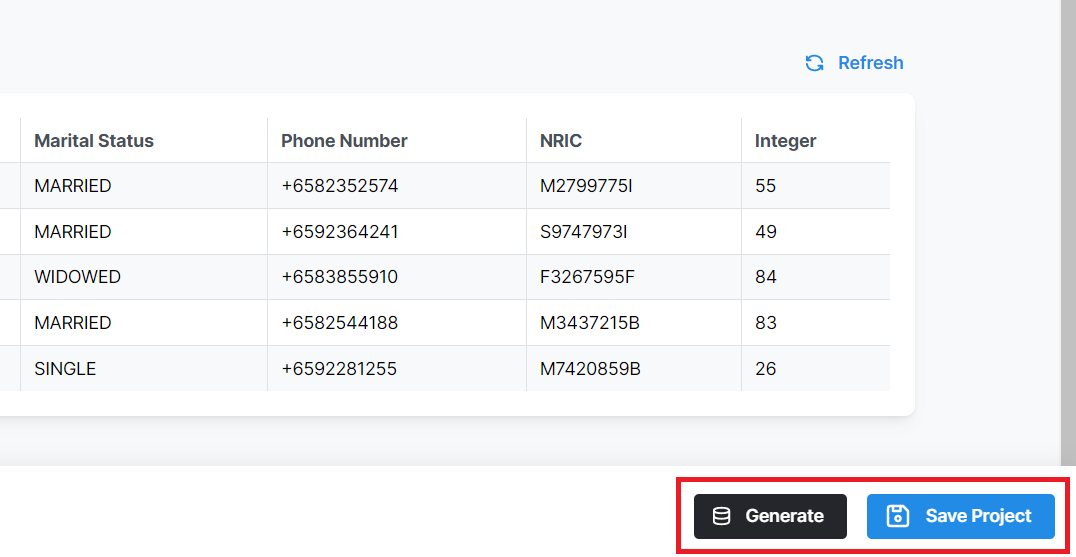
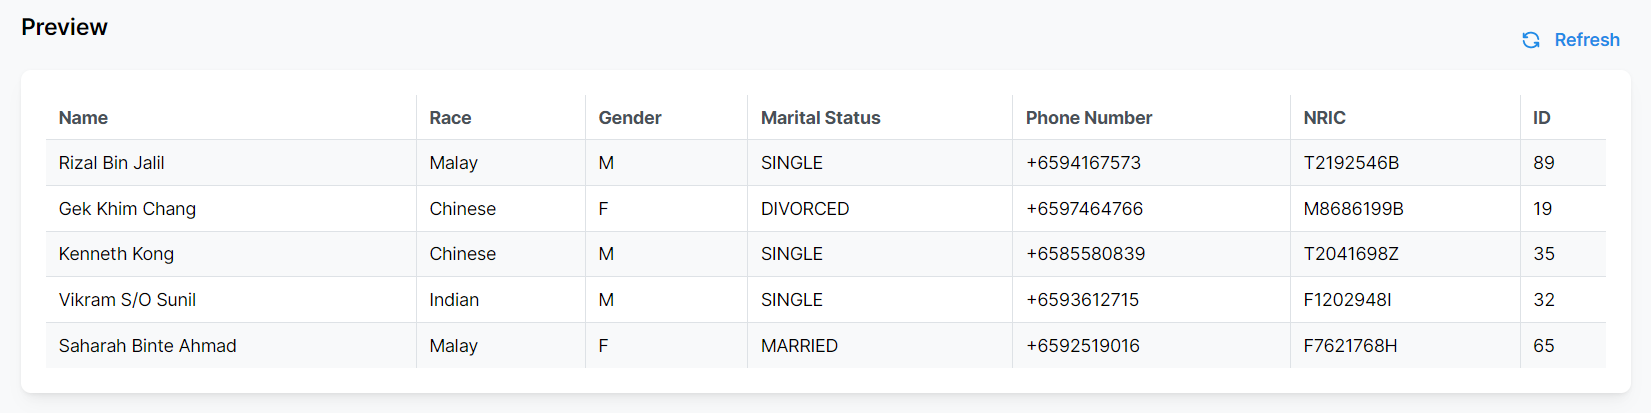
Step 4: Preview the mock data

You may preview the mock data at the bottom of the page. Click "Refresh" to view other examples of the mock data that will be generated.

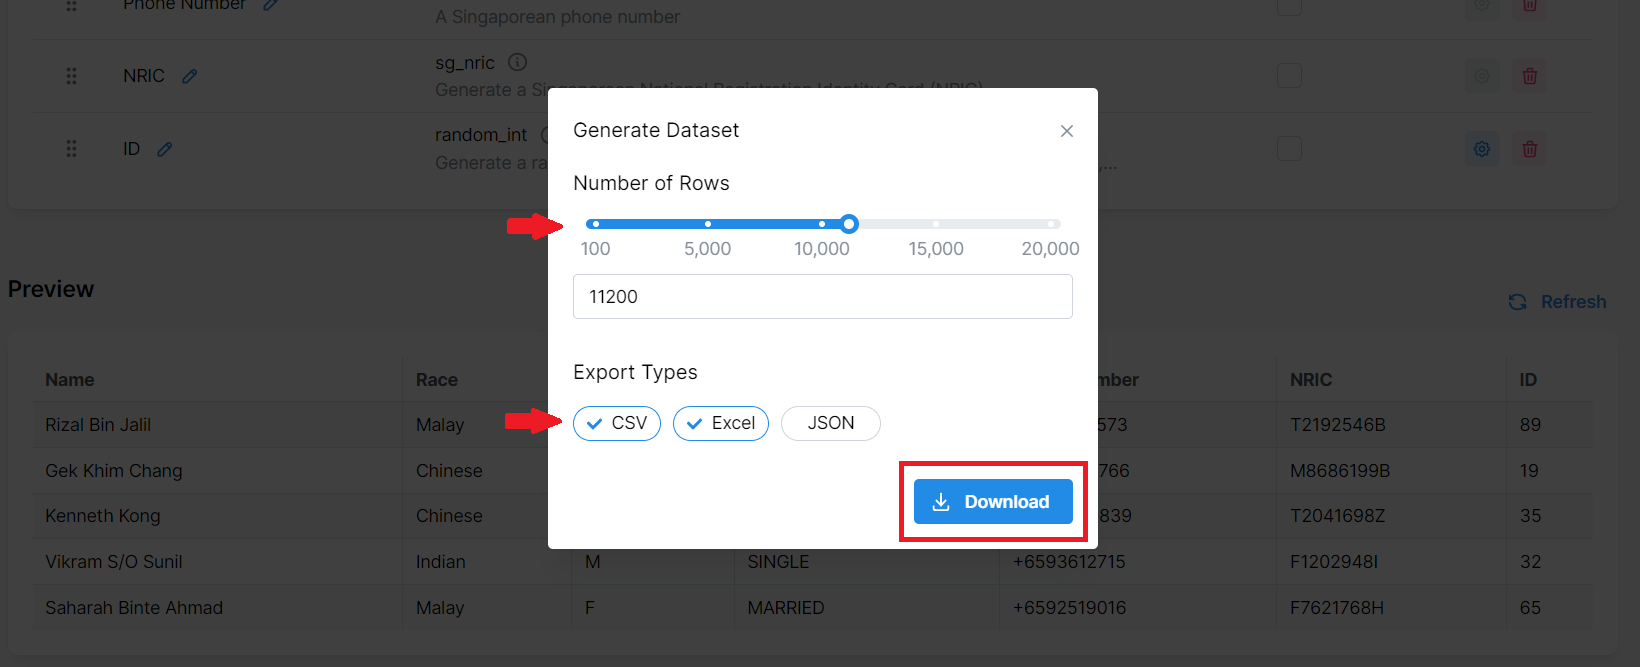
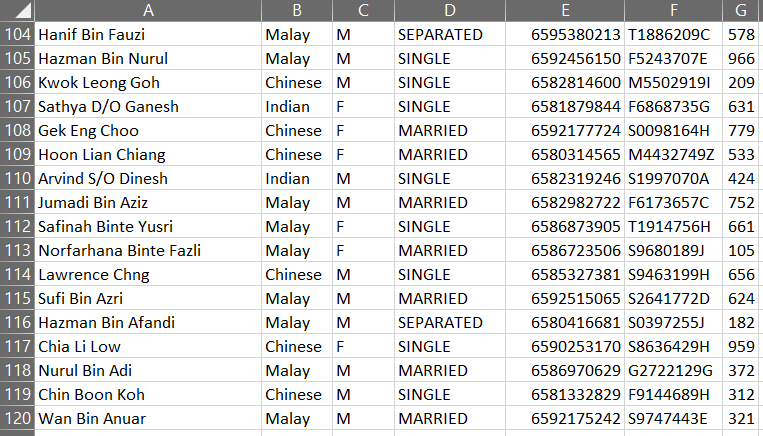
Step 5: Generate & download the mock data

Click "Save Project" to save your project settings. When you are ready to generate the mock data, click "Generate".

Select the number of rows to generate and the export type (CSV, Excel or Json) of your choice. Click on "Download" and wait a few moments for the download to begin.

Example of a generated mock data in CSV format

After a few moments, the mock data should be successfully generated and downloaded to your device.

Have some suggestions or feedback? Or were you unable to find the information you were looking for?

Please get in touch with us at [email protected], and we will be glad to help. 💙